Resurfacing hardwood floors is a great way to give them a fresh new look. Instead of replacing them altogether or doing half the project and refinishing hardwood floors, resurfacing is what ensures the wood surface is functional and good-looking at the same time.
Needless to say, this option is also a lot more affordable than buying and installing new hardwood floors, but also more advantageous than refinishing hardwood floors.
Of course, there’s a right time for all these projects, which is why you need to always keep an eye on your wood floors. Today, however, we’ll discuss resurfacing hardwood floors and what’s the proper way to approach this project.
Let’s begin!

Methods Of Resurfacing Hardwood Floors
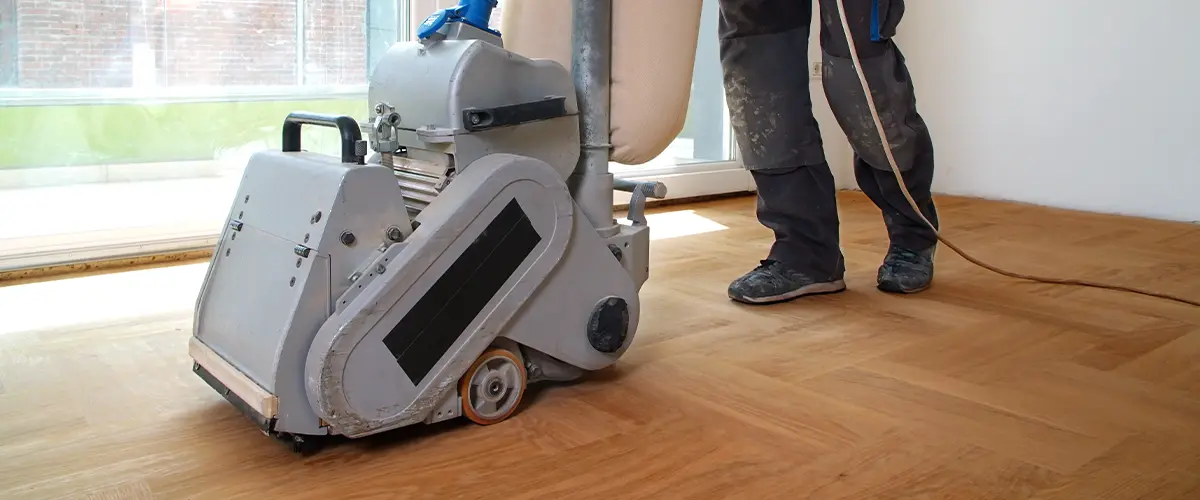
There are many ways to resurface a wood floor, but one of the most popular methods (and highly efficient) is to use a floor sanding machine.
Just like refinishing hardwood floors, you’ll need the sanding machine to remove the old sealants, the old finish, and any dirt or debris that may be on the surface of your hardwood floor.
It is important to note that if your floors are very old, they may need to be repaired before you can resurface them. This includes making sure there are no nails going out, and there’s no gaps between the wood boards.
Let’s see a quick overview of how resurfacing a wood floor usually goes.
Prepping The Floor
Aged hardwood floors will require some attention before resurfacing them. Prepping the hardwood flooring means making sure all the repairs have been taken care of before bringing in the sanding machine.
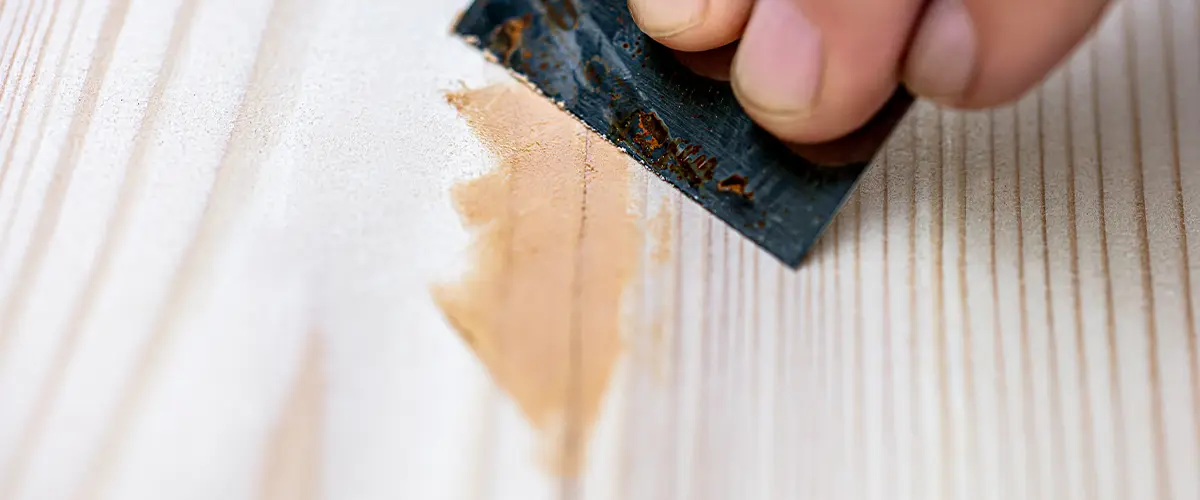
You can do this by filling in any cracks or holes with wood filler and hammering down nails that came out. If you feel the nail is still loose, take it out completely and replace it, but do it carefully so you don’t damage the wood board. Reinforcing wood planks with new nails is best left to flooring experts.
The final step in the preparation is using painter’s tape and a tarp to cover everything that you don’t want to be touched. If the furniture is too heavy to move around, cover it with a tarp so it’s safe from all the dust.
Sanding The Floor
After everything is set, it’s time to start sanding. Sand the surface until it is smooth and use different sand grits. There are special tools that’ll allow you to sand even the smallest corner, and if you want a job done properly, you’ll want to get your hand on one of those.
After you sanded the entire floor thoroughly and you’ve reached the natural wood grain, vacuum everything really well to remove all dust and debris. From this step, the resurfacing process is very similar to refinishing wood floors. Just like resurfacing, refinishing involves sanding and applying a new finish.
Although sanding is the biggest part of the process, there’s one more thing you’ll need to do, but remember, applying any type of finish requires a very clean surface.
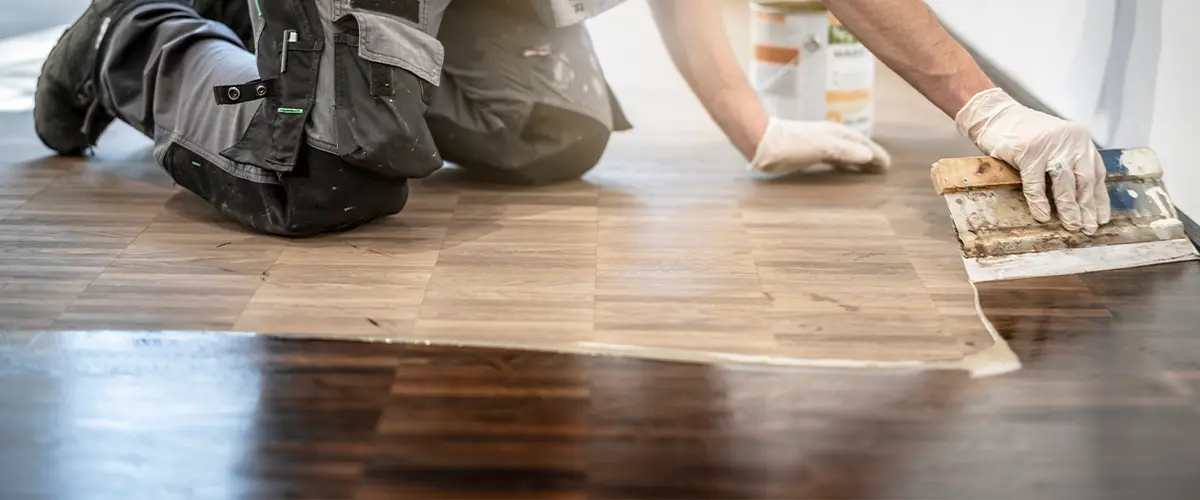
Choose A Finish
The toughest decision in this endeavor will be to choose a finish that’s right for your wood floors. Not all types of wood will look good with a hard wax oil finish, and not all of them will look great with a polyurethane finish.
There are many different types of finishes available, so it is important to select one that will match the look of your home and will be durable enough to stand up to daily use. Once you have chosen a finish, you will need to apply it using either a paint roller, either a cloth.
Be sure to follow the instructions on the can carefully, as each type of finish will require a different application method. Wood stain, for example, might be tempting, but it’s not the best treatment for a home floor.
Here are some types of finishes:
- Polyurethanes - these can be water-based or oil-based.
- Shellac - great for working with oily woods like tropical species, or pitchy woods, like pine.
- Acid-Cured Finish - this sealant dries very quickly and it's an extremely durable finish option.
- Penetrating Oil Sealer - all oil finishes will penetrate the wood better, but it's less durable.
- Hard Wax Oils - gives your wood floors a higher water resistance, but requires regular application.
Should You DIY Or Hire A Pro For Resurfacing Hardwood Floors?
This is a question that a lot of customers ask us. Without being biased, our answer will most of the time be to hire a professional. Not because we’re thirsty to get on your project, but because these wood floors will be in your home for another one, two, or three decades!
A professional will have the right tools, the knowledge, and the manpower to resurface your wood floors in the shortest time possible, without sacrificing anything from their quality.
With that being said, there are times where it’s okay to DIY your project. For example, if you have experience with installing and resurfacing wood floors, or if you have a professional sanding machine and the required time to start and finish your project, you may be able to resurface a hardwood floor by yourself.
Conclusion
Both hardwood floor refinishing and resurfacing hardwood floors can take a lot of time and effort.
You’ll need heavy machinery, and you’ll need to know how to operate it. In the worst case scenario, trying to resurface hardwood floors by yourself will result in a poorly resurfaced floor that’ll be inconsistent. You’ll be able to see the old and the new finish, and different hues of colors from the old floor.
If, on the other hand, you have had experience with resurfacing hardwood floors, you can give this project a shot and try to do it yourself. You can check the National Wood Floors Association for resources, or you can find more right on our blog!
In any case, your experts from Randy Stewart Hardwood Floors are at your service to help you resurface your wood floors in the best way possible. We’re offering professional hardwood resurfacing in Summerville, Charleston, and Mount Pleasant SC.
Call us today at (843) 900-4880 or request a free quote and let’s discuss your upcoming flooring project!